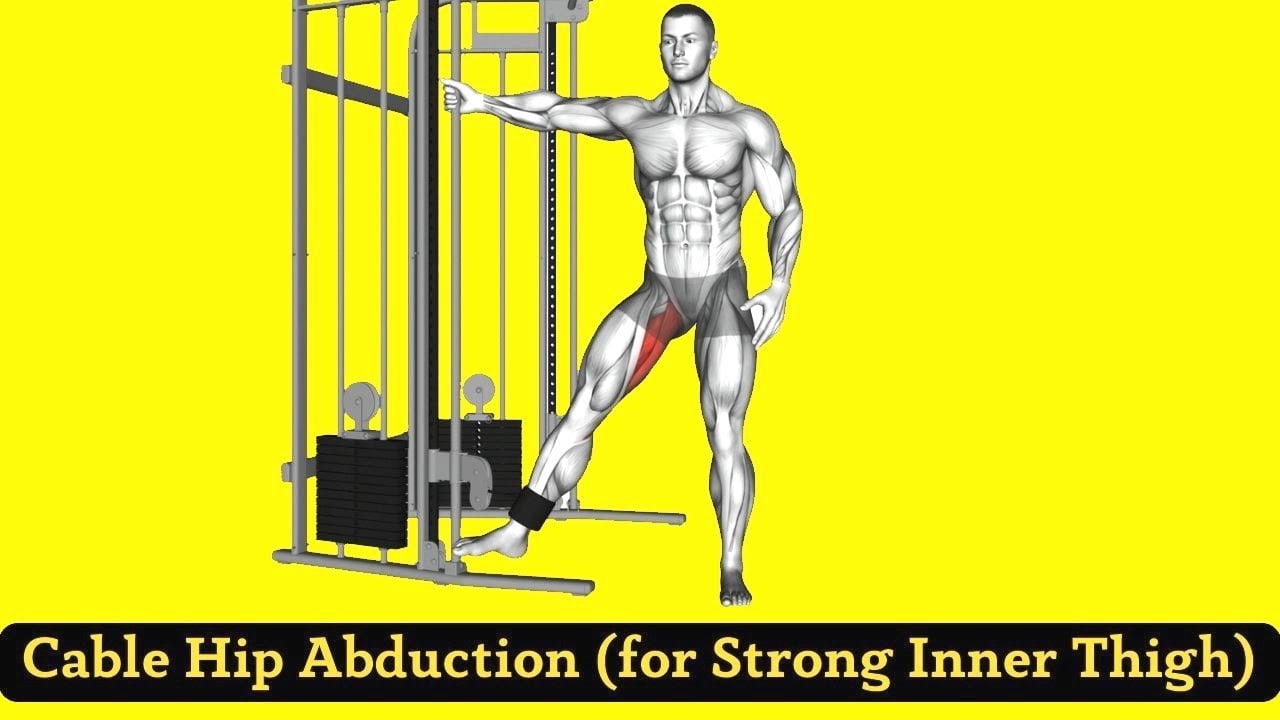
Cable hip adduction is an isolation exercise that specifically targets the adductor muscle group on your inner thigh, including the adductor Magnus, Longus, and Brevis.
You perform it standing next to a low cable pulley with an ankle strap attached to one leg, then draw that leg inward across the front of your body against the resistance of the cable.
What makes the cable version stand out compared to resistance bands or bodyweight variations is the constant tension.
The cable machine maintains resistance throughout the entire range of motion, from the starting position all the way through the peak contraction. That consistent load is what drives real muscle development. There is no slack at the bottom and no free ride at the top.
It is classified as an isolation movement, which means it is not replacing your squats or deadlifts.
Think of it as a targeted finisher or accessory exercise that addresses a weak link most compound movements simply cannot hit as directly.
- Cable Hip Adduction Muscles Worked
- How To Do Cable Standing Hip Adduction
- Proper Form and Tips
- How to Program Cable Hip Adduction
- Best Cable Hip Adduction Alternatives
- Seated Hip Adduction Machine
- Copenhagen Adductor Plank
- Resistance Band Hip Adduction
- Side-Lying Hip Adduction
- Sumo Squat
- Lateral Band Walks
- Frequently Asked Questions
- Is cable hip adduction good for building inner thighs?
- How often should I do hip adduction exercises?
- Cable hip adduction vs. hip adduction machine: which is better?
- What weight should I start with?
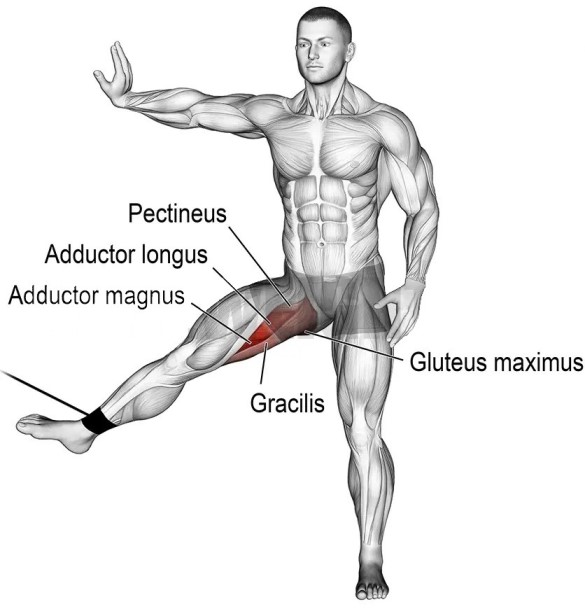
Cable Hip Adduction Muscles Worked
The primary muscle worked during cable hip adduction is the adductor muscle group, which includes:
- Adductor Magnus
- Adductor Longus
- Adductor Brevis
- Pectineus
- Gracilis
The exercise also engages the piriformis, obliques, and stabilizing leg muscles (quads, hamstrings).
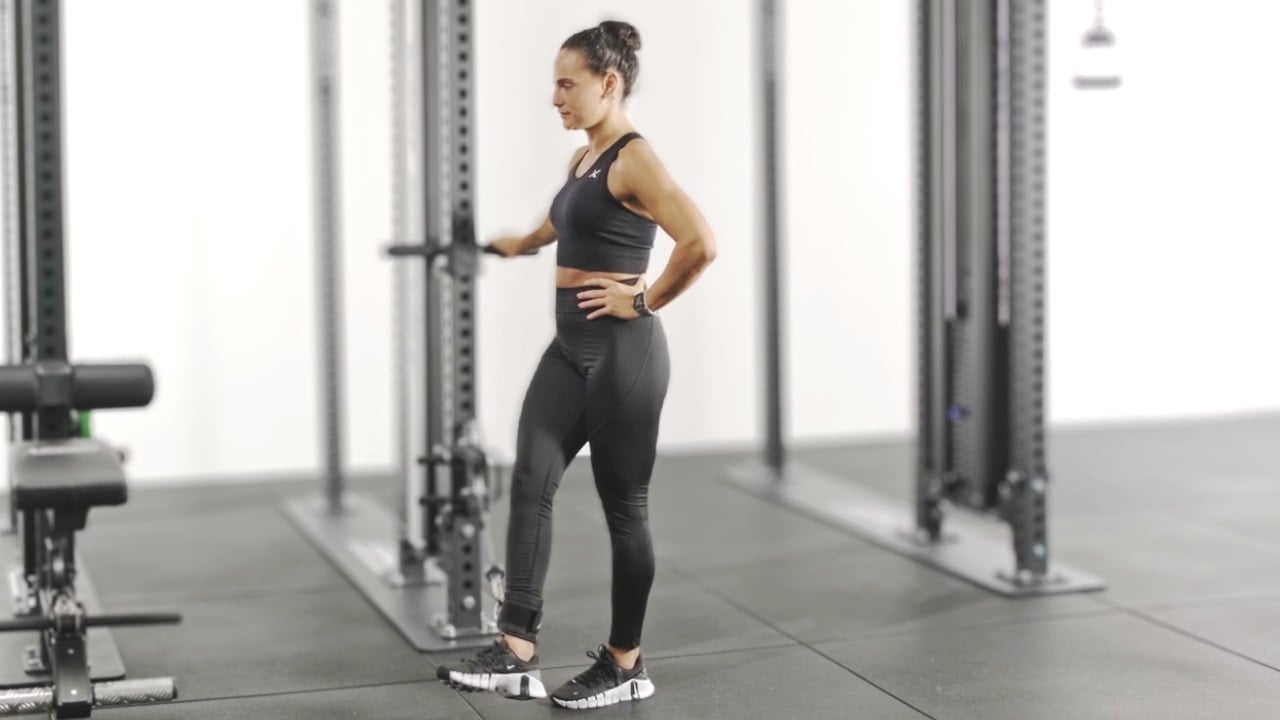
How To Do Cable Standing Hip Adduction
- Set the cable pulley to the lowest position. Attach an ankle cuff to the cable. Clip the ankle cuff securely around the ankle of the leg closest to the machine (your working leg).
- Stand far enough away from the machine that there is already light tension in the cable before you begin.
- Stand perpendicular to the cable machine with your feet about hip-width apart. Your working leg (attached to the cable) should be the one closer to the pulley.
- Hold the machine lightly for balance, but do not lean on it — this is a stability exercise too.
- Brace your core and keep your torso tall. Imagine a string pulling the top of your head toward the ceiling. Your hips should be level and your shoulders relaxed.
- Take a breath in. On the exhale, initiate the movement from your hip, not your knee or ankle. Think about drawing your inner thigh inward. Your working leg should cross in front of your standing leg smoothly and in a controlled arc.
- Hold the peak contraction for one second. Squeeze your inner thigh. You should feel the adductors on your working leg fully contracted at this point.
- Slowly return your leg to the starting position over two to three seconds, controlling the cable the whole way back. Do not let the weight stack pull your leg back.
- Complete all reps on one side before switching. Unclip the cuff, reattach to the other ankle, turn to face the opposite direction, and repeat on the other leg.
Proper Form and Tips
These are the cues I give clients most often. Follow them, and you will get significantly more out of every set.
- Keep your back straight and avoid leaning away from the machine or towards the weight. If you find yourself leaning your torso away from the machine to move the weight, the load is too heavy. Drop the weight and maintain an upright position.
- Initiate the movement by pushing with your heel rather than swinging your toe, you naturally rotate your femur inward and get much better adductor recruitment.
- A nearly straight leg is correct. But locking the knee completely out creates unnecessary joint stress. A five to ten degree soft bend is ideal.
- Exhale as you pull the leg inward, inhale as you return. Do not hold your breath, especially on higher rep sets.
- Going past your natural range of motion under load risks straining the hip joint and adductor tendon. A safe range is roughly 20 to 30 degrees past the midline. If you feel any pinching in the groin, that is your cue to back off.
How to Program Cable Hip Adduction
Here is how I typically program this exercise for different goals. It works best as an accessory or finisher movement after your main compound lifts like squats, lunges, or deadlifts.
| Goal | Sets | Reps | Tempo |
| Strength | 3–4 | 6–8 | 2-1-3 |
| Hypertrophy (size) | 3–4 | 12–15 | 2-1-3 |
| Endurance / Rehab | 2–3 | 20–25 | Controlled |
| Athletic Performance | 3 | 10–12 | Explosive in, slow out |
Rest 60 to 90 seconds between sets. For rehab or beginners, start at the lighter end and prioritize feel over load.
Where to place it in your session: Perform cable hip adduction after your main compound lower body lifts.
Doing it before squats or deadlifts would pre-fatigue the inner thigh stabilizers you rely on for those heavy movements. Save it for the back half of the workout.
Best Cable Hip Adduction Alternatives
No cable machine? Or just want to add variety? Here are the best alternatives, and when to use each one.
Seated Hip Adduction Machine
Best for beginners. It removes the balance challenge entirely and lets you focus purely on loading the adductors.
The downside is that you are training in a seated position, which does not carry over as well to athletic or functional movement.
Use it when you are just starting out or when you want to go heavier without worrying about stability.
Copenhagen Adductor Plank
One of the best evidence-based exercises for adductor injury prevention and strength. Research from Sport Performance specifically recommends it for reducing groin injury rates.
It requires no equipment and challenges the adductors under significant load using your own bodyweight. This is a must-have for athletes.
Resistance Band Hip Adduction
A great option when you are training at home or traveling. The resistance is lighter and less consistent than a cable machine, but it gets the job done for maintenance and lighter training days.
Anchor the band to a low fixed point and mimic the same movement pattern.
Side-Lying Hip Adduction
A bodyweight option that is excellent for beginners, warm-ups, or rehabilitation. Lie on your side with your top leg resting in front or behind, then lift your bottom leg toward your top one.
It is gentle on the joints and helps establish the mind-muscle connection before moving to loaded variations.
Sumo Squat
While not a true isolation movement, the sumo squat places significant demand on the adductors due to the wide stance and toes-out positioning.
If you want to build adductor strength within a compound pattern, sumo squats are a smart addition. Pair them with direct adductor isolation work for best results.
Lateral Band Walks
Lateral band walks are primarily a hip abductor exercise, but the adductors on the trailing leg control the movement eccentrically.
They work well as a warm-up activation drill or paired with cable hip adduction as a superset to train both sides of the hip joint.
Frequently Asked Questions
Is cable hip adduction good for building inner thighs?
Yes, it is one of the most effective exercises for directly targeting the adductor muscle group. The cable provides constant tension through the full range of motion, which is key for hypertrophy.
Combined with progressive overload and a proper nutrition plan, consistent training will increase both the strength and visible definition of the inner thigh.
How often should I do hip adduction exercises?
Two to three times per week is generally ideal for most people. This gives you enough training frequency to drive adaptation while allowing adequate recovery.
If you are using it for injury rehab, follow the guidance of a physiotherapist on frequency and loading.
Cable hip adduction vs. hip adduction machine: which is better?
Both are effective, and the right choice depends on your goal. The cable version adds a balance and stabilization challenge, translates better to athletic movement, and allows a more natural range of motion.
The machine removes the stability element and allows heavier loading in a seated position. Beginners tend to start with the machine and progress to the cable version as their balance and strength improve.
What weight should I start with?
Start lighter than you think you need to. This is an isolation exercise with a relatively short movement arc. Most people find that 5 to 15 lbs is a challenging starting point, especially when using proper form with a slow tempo.
Your ego is not welcome at the cable adduction station. Pick a weight where you can feel the inner thigh working clearly through all reps, then increase gradually from there.

Manish is a NASM-certified fitness and nutrition coach with over 10 years of experience in weight lifting and fat loss fitness coaching. He specializes in gym-based training and has a lot of knowledge about exercise, lifting technique, biomechanics, and more.
Through “Fit Life Regime,” he generously shares the insights he’s gained over a decade in the field. His goal is to equip others with the knowledge to start their own fitness journey.