
The torso rotation machine also called the rotary torso machine or abdominal twist machine. It is a guided, weight-stack machine that lets you rotate your trunk against resistance while your hips and legs stay fixed in place.
It isolates the hard-to-target obliques more directly than some other ab machines and free-weight exercises.
It comes in three common configurations: seated (most gyms), kneeling, and a standing cable/lever version.
Before you start:

If you have a history of disc herniation, spondylolisthesis, or any diagnosed lumbar spine condition, get clearance from a physician or physical therapist before loading rotation. Spine research consistently flags repetitive, loaded axial rotation as a higher-risk pattern for the lumbar discs than flexion or extension alone.
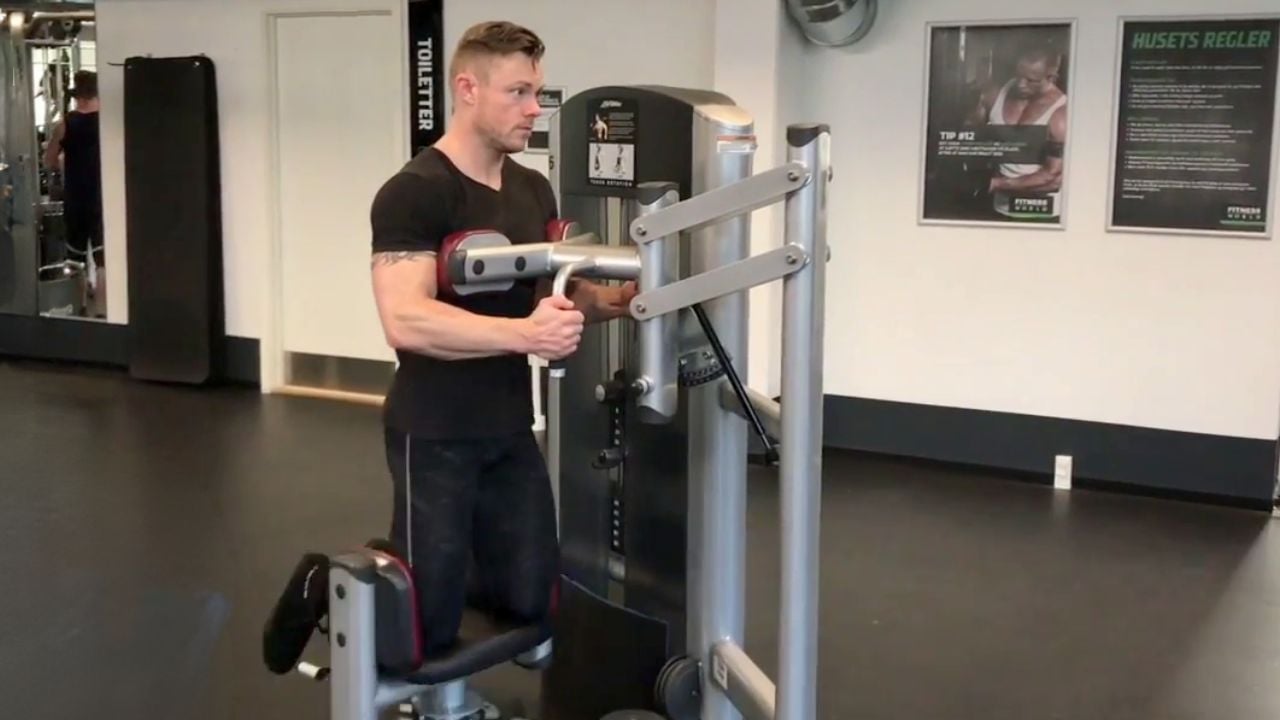
Machine Torso Rotation Muscles Worked
Trunk rotation isn’t driven by “the obliques on the side you’re turning to,” which is a common coaching cue — but it’s backwards.
Your external and internal obliques work in diagonal pairs across the body: rotating to the left is produced by your right external oblique contracting together with your left internal oblique.
Rotating to the right reverses the pair — left external oblique + right internal oblique.
- Primary Muscles Worked: Obliques (External & internal obliques)
- Secondary Muscles Worked: Rectus abdominis and Transverse abdominis
- Other Muscles Engaged: Spinal erectors, Hip flexors, and Quadriceps.
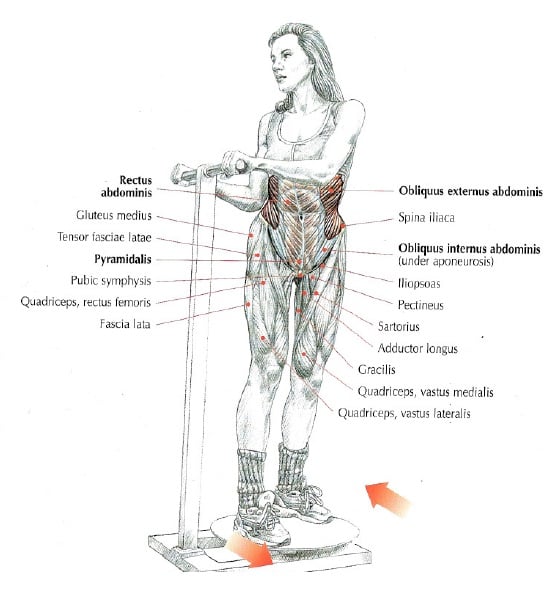
Benefits of the Rotary Torso Machine
- Loaded oblique isolation. Because your hips are locked, almost all the resistance goes into the obliques rather than being shared with hip rotators, which is hard to achieve with free-weight rotational work.
- Progressive overload for rotation. Most rotational core exercises (cable woodchops, medicine ball throws, Russian twists) are limited by what you can hold or throw safely. A weight stack lets you progress load in small, controlled increments.
- Anti-rotation carryover. Training the obliques to produce and resist rotation transfers to bracing during squats, presses, and changing direction in sport.
- Built-in range-of-motion control. Most machines have an adjustable ROM limiter, which is useful for beginners or anyone working back from a minor strain.
- Unilateral correction. Performing equal, controlled reps to each side helps surface and address left/right strength asymmetries that bodyweight twists rarely reveal.
Know More Body Fat %: Use Our Free Body Fat Calculator
How To Do Seated Chest-Supported Torso Rotation
- Adjust the seat height so that your feet are firmly planted on the floor. Your chest should be pressed comfortably but securely against the chest pad. This is key—it locks your upper body in place so the rotation comes from your torso, not your arms or shoulders.
- Grab the handles with a neutral grip (palms facing in). Don’t white-knuckle them; your arms are just there to anchor you.
- Before you move an inch, tighten your core. Imagine someone is about to poke you in the stomach lightly.
- Exhale and smoothly rotate your torso to one side. Focus on squeezing the oblique muscle on that side. Go as far as you can without your chest lifting off the pad or your hips shifting.
- Pause for a brief second at the peak of the rotation. Feel that squeeze in your side.
- Inhale and slowly, resisting the pull of the weight stack, return to the starting position.
- Repeat the movement on the other side. Completing one rotation to each side counts as one full rep.
- 2–3 sets of 10–15 reps per side.
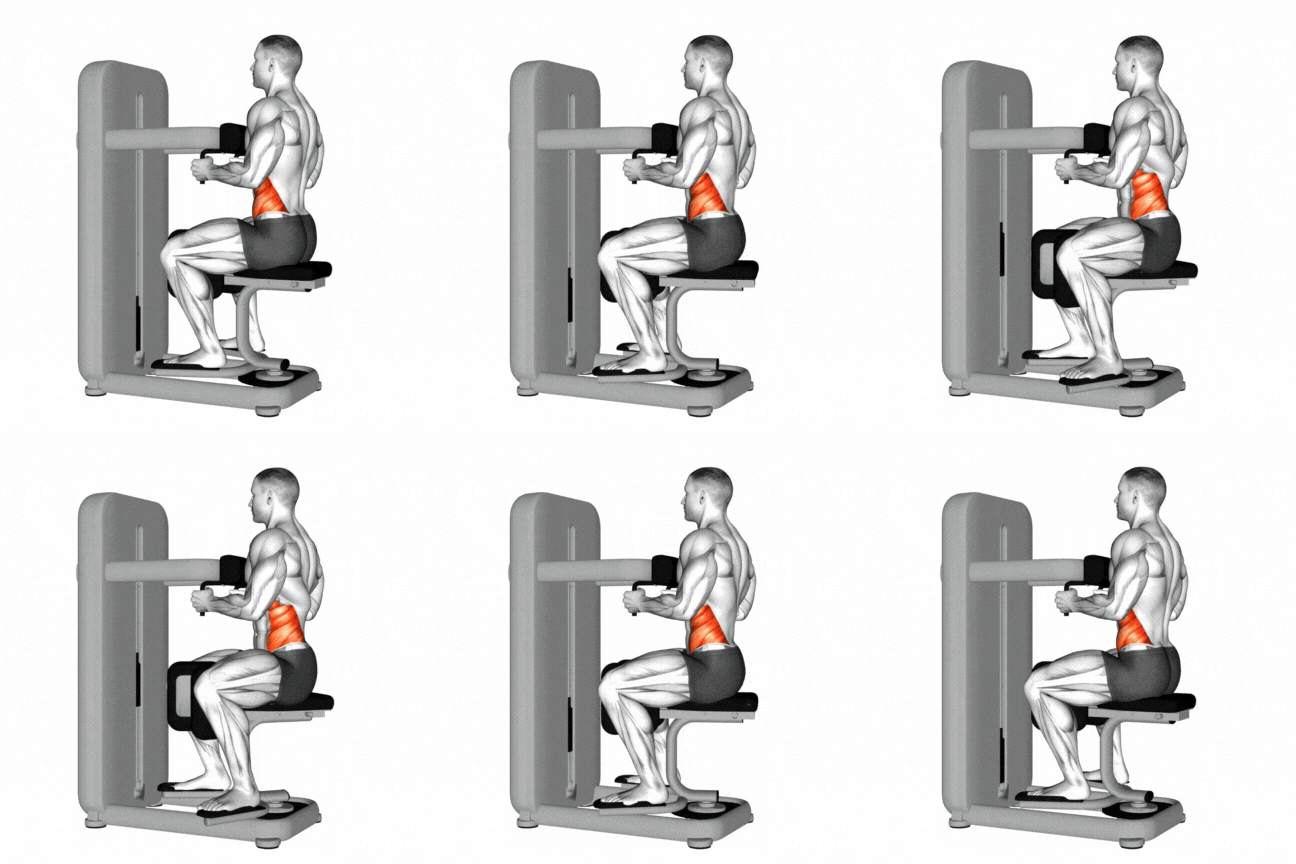
Tips and Form
- Your chest should remain pressed against the chest pad throughout the entire movement. If it lifts off, you’re likely using too much momentum or your lower back is compensating.
- Avoid jerking or swinging your torso. The slower and more controlled you are, the more your muscles will work.
- It’s easy to hold your breath during intense exercises. Continue to breathe steadily; let out air as you turn and breathe in as you come back.
- Maintain this core engagement throughout the exercise.
Kneeling Torso Rotation
The kneeling version removes the foot platform that helps you stay still in the seated version, so your hip flexors and glutes have to work harder isometrically just to keep your lower body anchored.
That makes it a reasonable progression once seated rotation feels easy at a given load — not a beginner default.
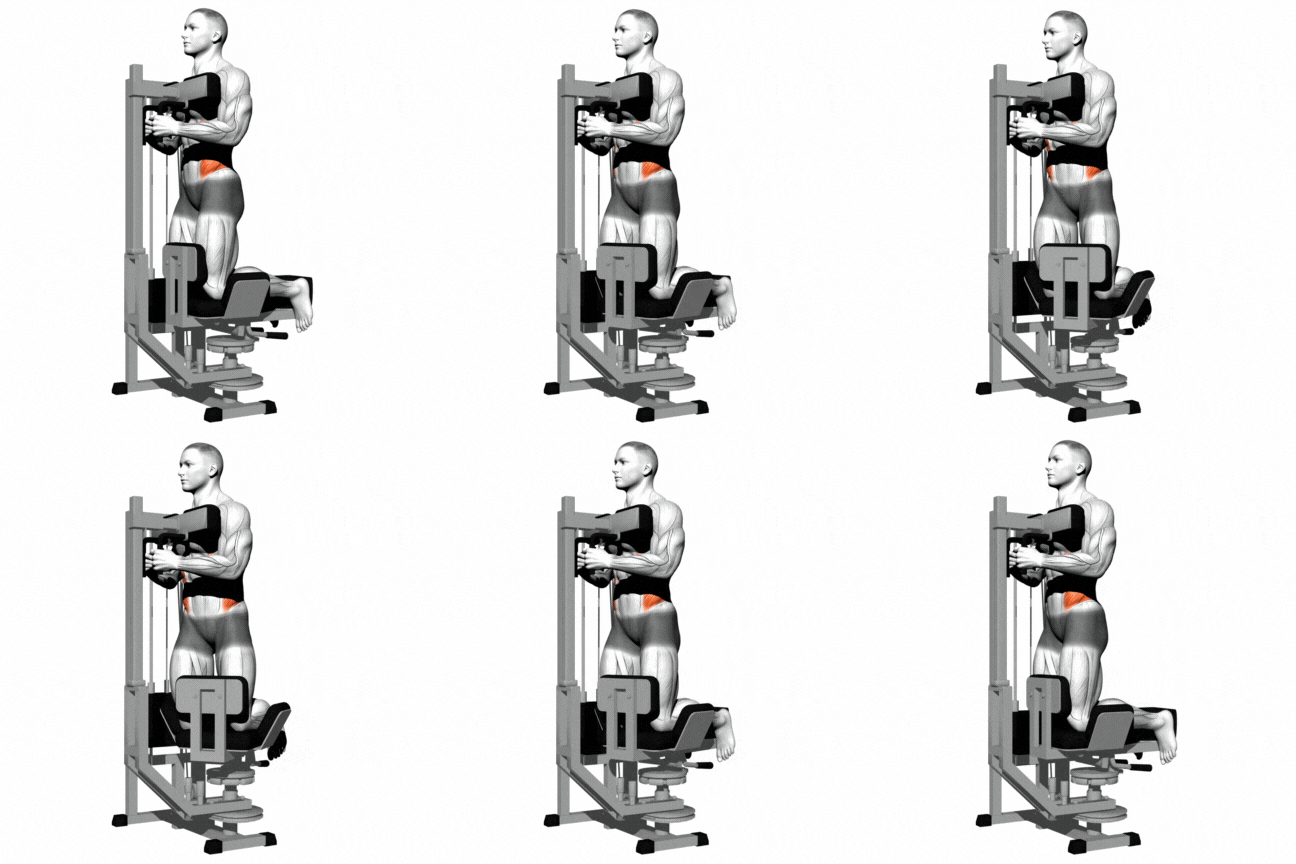
How To Do It
- Adjust the seat and kneel facing the chest pad, with your shins resting on the kneeling pad.
- Lean your chest into the front pad and grasp both handles at shoulder height.
- Brace your core, then exhale and rotate your trunk to one side under control.
- Pause at end range. You’ll feel the working diagonal pair contracting and the opposite diagonal pair lengthening through your side and lower ribs — don’t force extra range by rounding your lower back to “reach” further.
- Inhale, control the return, and repeat on the other side.
Standing Rotary Torso Machine
The standing rotary torso machine offers several unique benefits over kneeling torso rotation and seated torso rotation.
- The standing position mimics everyday movements, such as twisting and turning.
- It reduces stress on the knees and ankles compared to kneeling torso rotation.
I appreciate how the standing position makes the exercise feel more ‘athletic.’ I stand with my feet and hips apart, holding the machine handles, maintaining a natural, upright posture.
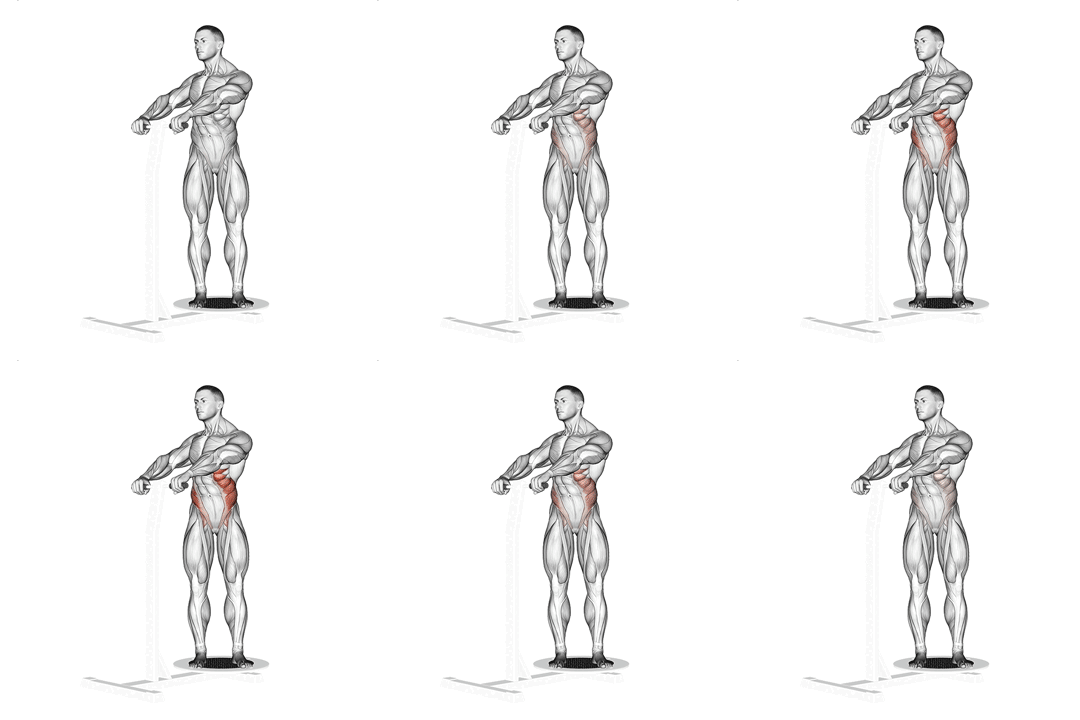
How To Do It
- Stand on a twisting machine with feet and hips apart and hold the machine handles.
- Assume a normal posture, with your back straight.
- Keep your head and upper torso in their starting position – immobile.
- Exhale and twist the pelvis slowly to your right, as far as possible.
- Hold the stretch for several seconds and return to your starting position while inhaling.
- Perform the stretch on the other side, this time turning to your left as far as you can.
References
- ABMP Massage & Bodywork Magazine — “External Oblique,” anatomy and function of the external oblique in trunk rotation.
- Kenhub — “External Abdominal Oblique: Anatomy, Innervation, Function.”
- Kenhub — “Internal Oblique, External Oblique, Transversus Abdominis,” lateral abdominal wall function and stabilization role.
- CyVigor — “Rotary Torso Machine: Targeted Muscles for Core Strength and Stability,” on the transverse abdominis’s stabilizing (non-rotational) role during machine-based trunk rotation.
Medical disclaimer: This article is for educational purposes and isn’t a substitute for individualized medical or physical therapy advice. If you have a current back injury, a diagnosed spinal condition, or new or worsening pain during rotational exercise, stop and consult a physician or physical therapist before continuing.

Manish is a NASM-certified fitness and nutrition coach with over 10 years of experience in weight lifting and fat loss fitness coaching. He specializes in gym-based training and has a lot of knowledge about exercise, lifting technique, biomechanics, and more.
Through “Fit Life Regime,” he generously shares the insights he’s gained over a decade in the field. His goal is to equip others with the knowledge to start their own fitness journey.